
The Tray

The Tray -

The Third task to the course was to turn a 200mm x 110mm rectangle piece of aluminium into a tray by reshaping the edges of the aluminium.

Material:
  • 200mm x 110mm Aluminium sheet
Tools used:
  • Marking pencil
  • Ruler
  • Tin snips 
  • Tapered plastic mallet
  • Chasing hammer
  • Personalised timber dolly x 2
  • Small clamp
  • Workbench clamp 

Step 1

The first step was to measure and cut the desired aluminium piece. The guillotine was used to get the initial size of the tray, once the sheet was cut it could then be marked to indicate the cutting and bending sections.

Step 2

Once the aluminium sheet was marked and cut into the final stage before hammering, the wooden dolly was then also marked to help align the two sides when clamping the aluminium, this is a crucial step to ensuring the edges are as even as possible. Tip: I used a smaller hand clamp to help hold it all together so precise pressure adjustment could be used to allgin it perfectly.

Step 3

Once the aluminium was lined up between the two wooden dollies properly it was then transfered to a table clamp to ensure it stayed rigid whilst the metal forming could begin. Using a combination of the plastic mallet and the chasing hammer, I could begin bending the edges of the tray in, ensuring each deformation was small and precise to prevent the corners from folding over each other. Once the top half was complete it was then easier to rotate it around to do the bottom half as the dolly remains in place due to the bending of the first half.


Step 4

Finally the trickiest part was to retrive the metal tray by itself. Due to the wood being soft and the corners of the alumiumun folding in so tightly the tray wouldnt slide out on its own. The solution to this was to drill a couple screws into the dolly to be able to wedge the aluminium from the wood.


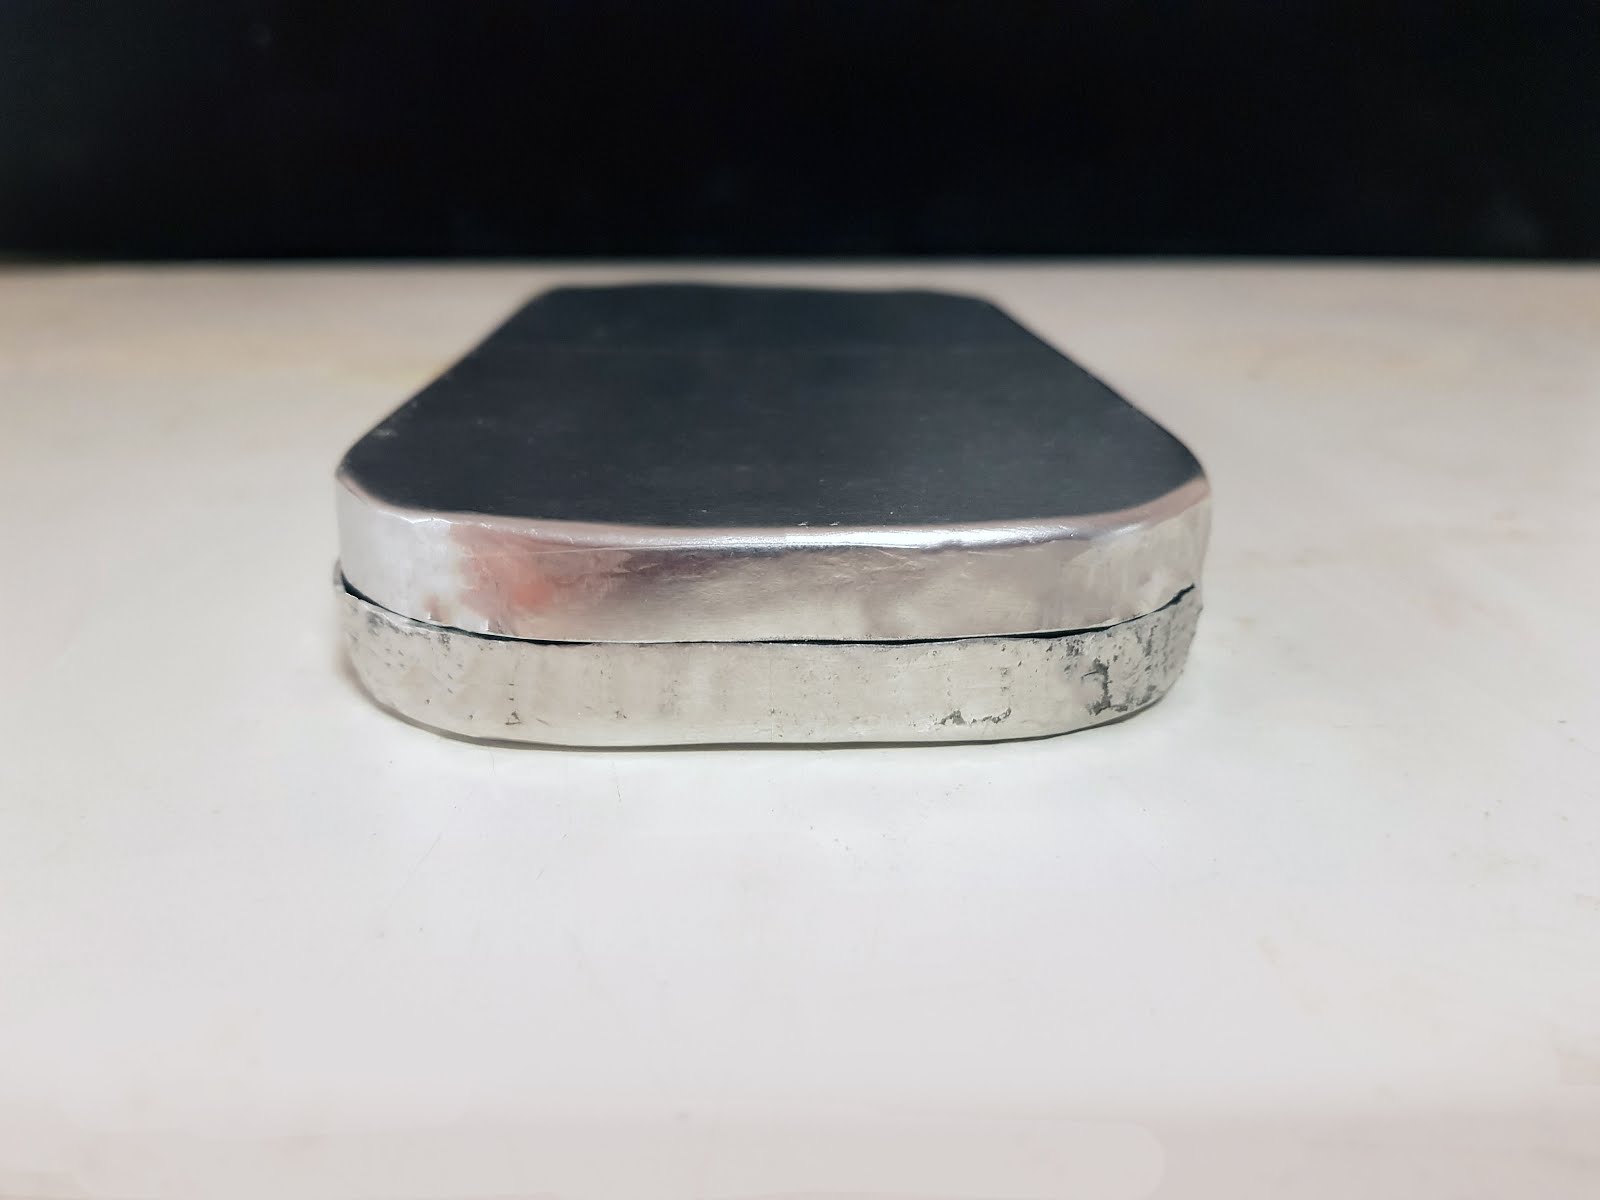
Final result comparing to another students tray. (My tray is on the top)


Step 5
Sand and polish for a smoother surface finish.

Final Pictures


Comments

Popular posts from this blog

Critical Review

Critical Review - As seen in my previous blog post the 1:1 Motorbike tank proved a success but also instantly proved to be the most difficult. As the shape required the implementation of multiple techniques due to its non-uniform shape. Through a short personal reflection on the resulting piece, I aim to identify its strengths and weaknesses, as well as an alternative approach to the fabrication process. Strengths: Prior knowledge By understanding basic fabrication techniques and how to apply them to achieve specific shapes, it made it a lot easier to plan and combine these techniques to create a non-linear shape. Previous work from Assignment 1 The Torus's shape The torus indentation was truly the highlight of the piece, whereby it had a uniform curvature but also had a narrow starting point and gradually widened and flattened out around the front end of the tank. Torus curvature Only one piece of metal As seen in the pictures the side piece of the t...

The Fuel Tank 1:1

The Fuel Tank 1:1 -  Team members: Daniel Camacho z5113840 Ryan Johann z5118301 Branko Cosic z5060413 The Second assignment for BEIL0014 was to create a 1:1 motorbike fuel tank out of aluminium using the metal forming techniques learnt from assignment 1. In teams we were required to choose one of three tanks to construct; Peanut shape tank found on a Harley 883 Iron or a taller, squarer tank found on the Yamaha IT250 or a custom tank found on a Honda CB550. My team and I chose to do the custom Honda CB550 tank. Material: Aluminium sheets 50mm Plywood 4x screw and bolts Tools used: Nylon mallets  Dolly hammer Sand bags Spanner Custom wooden tools English wheel Wooden stump Guillotine Metal dolly Shrinker  Boben sander Approach: Having selected the CB550 tank that was modelled in a modelling program called Grasshopper and having previous experience in the program, we knew we could further push the boundaries of the design to creat...

The Torus

The Torus - The Second task to the course was to turn a 200mm x 100mm rectangle piece of aluminium into the shape of a torus through the manipulation of reshaping the properties of the aluminium. Material: 200mm x 100mm Aluminium sheet Tools used: Marking pencil Ruler Tapered plastic mallet Chasing hammer Cylindrical wooden stump with concave void Metal horse shoe dolly English Wheel  Step 1 Using the ruler I could measure the aluminium plate into sections which would be responsible for the different sections of curvature. Step 2 The stump with the concave void was the first major tool responsible to get the initial curve started, by using a second pair of hands to help it greatly increased the effectiveness of this step, allowing the aluminium to have a consistent pressure wrapping around the wooden block helping it maintain the main curve whilst still being able to hammer down the middle resulting in the shrinking and second curve to...